...where I share my life, craftiness and eating habits with the world...

Friday, March 29, 2013

Favorite City Charm Necklace


My best friend and her daughter used to live in Chicago.
Not a suburb, but really in Chicago.
In a really beautiful high-rise apartment, on the top floor, with a super great view of downtown.
I LOVED to visit them.
Alas...time moves on, and now they live back in our town.
Don't misunderstand, we love having them back, but her daughter really misses Chicago.
So I thought I'd make her this necklace as a way to remember that she could wear.
It was really easy too.
I got to use the drill(I love power tools too).
Luckily my hubs had just got himself some new drill bits and there was a teeny tiny one that was perfect for this project!!
First of all, I had saved a small map of Chicago that I got on our last trip up there.  (It was from our hotel and it was free!)
I got my Modge Podge and scissors, large jump rings and a pre-made red ball chain.
That is it!
Shh, I made the Loop Subway/El one for my daughter, she just doesn't know it yet.
Don't they look super great???
 
 
The heart one is special, because I put the heart right on the corner of where they lived the first time we visited.
Right on the corner of Clark and Fullerton.
(Lucky for me the free map had both of those streets on it)
Anyway, I used the Modge Podge to affix the maps to the hearts, and then I shellacked a layer over the top to make it really sturdy.
I really hope she likes it.
Oh yeah, we are going up there on Monday for Spring Break!!
It's going to be a ball.


Thanks for reading!!
:D

Easy Bunny Hoop Decor aka Frank


This is almost the easiest thing I have ever made, and soooo cheap.  Perfect for a lazy crafter like me.
(Not that you are too, but I can be sometimes.)
Anyway, I came up with this idea because the cost is so low.
About $3 total.
I had the fabric and the pompom for the tail.
All I really had to buy was the hoop, and for that I used a 50% off coupon from Joann's.  It came to about $0.75.
I made the bunny template myself on a copier at work(I don't suggest this if your employers keep track of that stuff, but luckily mine don't.)  I found an online pic that I liked and enlarged it until it was the size I wanted.
 
First thing I did, was decide on the fabric I wanted to use.  I actually just bought this a week or so ago, and it was on sale, so double score!
I knew this was the perfect spring colors to decorate with.
Next, I traced the bunny I cut out onto the wrong side of the fabric with some fabric ink(it disappears in 24 hours)
 
Then I cut him out(let's call him Francois, I like french bunnies)
Next I tried my best to center Francois(Frank for short) on the fabric square I cut out and pin him on.
 
 
I sewed him on, but the cool part is that you could glue him on too!
Modge Podge or fabric glue, or hot glue or even Elmer's glue(the dry time is longer for some of them though.
 
 
I left his edges loose so he can fray over time and look very "shabby chic".
After I centered him in the hoop and got it all tight all the way around, I trimmed the excess and tightened the hoop as tight as I could without breaking it.
Then I hot glued on a fluffy pompom tail.
He turned out so cute I just can't stand it.
And Voila!!!(see, french)
Bunny aka Frank.
 
Thanks for reading!
:D

Wednesday, March 13, 2013

Fabric Easter Eggs


I found this product inspiration on Pinterest.  If you don't follow me on Pinterest, you should.  I have been pinning stuff like crazy for a long time.  And it's good stuff, not just junk.  But I digress...
I went to the site for these and there was no tutorial, so I thought I'd wing it and if they ended up cute, I would share them with you.
 
Step 1
Cut out 2 egg shapes, one a tad bigger than the other.
I like to use recycled cereal and food boxes b/c it makes a sturdier pattern.  :)
 
Step 2
Cut out(using the smaller egg) lots of colorful fabric eggs.
Scraps work great for this!
 
Step 3
Cut out( using the bigger egg) enough white fabric eggs for the backs.
I used batting type fabric b/c it is what I had on hand.
Fleece or felt would work too.  I liked the crisp white too, it looks more egg-y(is that even a word?).
 
 Step 4
Layer the front and the back and sew almost all the way around the egg.  Leaving a space to insert the dowel rod.
Like so.
 
I think they turned out so very pretty.  I tossed some Easter grass in a hurricane and tied it up with a pretty bow!  All set for Easter.  This is the perfect centerpiece for my dining room table.


Hurricane glasses are good for all kinds of uses.  I use mine for almost every holiday.  Candy corn for Halloween, ornaments for Christmas.  I used beads here for St Patrick's Day, and you could also put eggs in it for Easter.  Just so versatile...Lemons and apples are good for summer, etc, etc, etc.  You get my drift.  :)


Thanks for reading!!
:)


Thursday, February 21, 2013

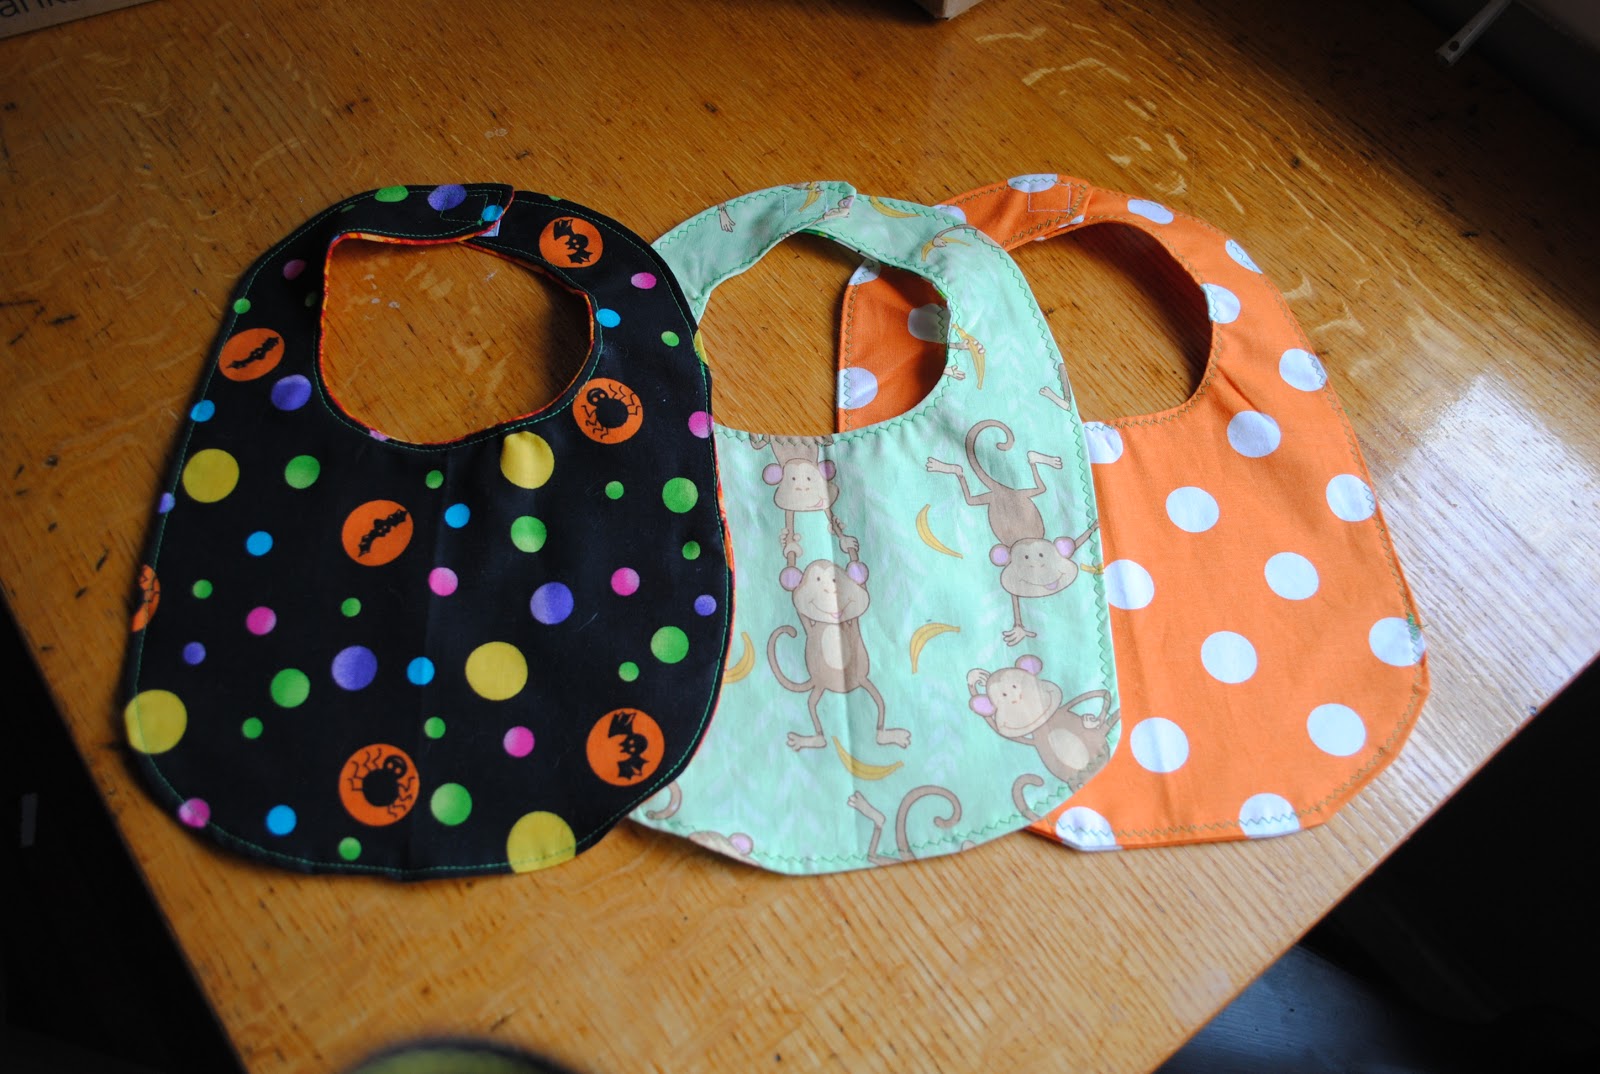
Super Easy Baby Drool Bib

 
My neighbors recently had a baby.  A boy.  He's so cute(I've only seen pics so far...but he is).  She didn't need anything(or so she said) so I decided to make her some cute little drool bibs.  Just like I did for my son when he was born, because let's face it, you can never have too many drool bibs.  :)
I made each side a different color because it it more fun and more versatile.
 
I found a bib pattern online here, or here, or you can make your own by tracing a bib you like.
I first cut out one of each color fabric.
 
 
Then I put the fabric shapes right sides together and sewed all the way around leaving a 2 inch opening for turning.
 
 
There is the opening^^^
Next I used my turning tool to get nice crisp corners and get it all ready to be ironed.
 
 
When you iron, make sure you fold in the opening and iron it flat.  That makes it really simple to sew closed.
 
 
There it is all flat and pretty.
 
 
I sewed the bib shut and then all the way around with a zigzag stitch for decoration.  You can use whatever stitch you want.  I started with the opening.
 
 
The zigzag looks really cute on this one.  I also used contrasting color thread to make the stitches more decorative.
 
 
After it is all stitched you can add the Velcro closure.  I use no-snag Velcro so the bib wont scratch baby's sensitive skin.
 
 
Here's a few more that I made for her.  I hope she likes them.
The best part?
One bib takes about 20 minutes from start to finish, so if I can do it, you can too.
 

Thanks for reading!

Sunday, February 10, 2013

Dolly Panties


My sewing group finally got together again last month and made some Dolly Panties.  I got the super awesome tutorial and pattern here at Make it and Love it.
I changed it up a little, because I really dislike sewing with elastic thread.  I mean it really dislike.
Anyway, we used skinny little elastic and guess what?  I thought they were way easy because there is no thread changing(which is the bane of my existence) and sooooo fast.  I made 3 pairs in under an hour.
My friend Adie of Crazy Adie's Creations won an awesome gift box from Pick Your Plum that had all these super cute little decorative elastics in it.  We decided they would be perfect for little panty trim.  We were so right.  :)
I love the aqua on the black & white stripe.
The best part?  These were totally free to make too!  I used knit scraps and elastic on hand(as well as gift box pretty elastic).
My daughter loves them too and now changes her dolls panties almost daily.  :)


Thanks for reading!
:D


Update on the Weight War


As many of you know I have an ongoing war with food.  I love it, but it hates me.  Exercise, I hate it but it's good for me.  The good news here is that I've actually been trying,  really, really hard and I lost 12 lbs so far this year.
I know, I can't believe it either!
How did I do it you ask?
Diet and exercise.
Blah, blah, blah...
I go to the gym 6 days a week and use My Fitness Pal to track my calories and exercise.  It was really hard at first and there were many days I'd think I was going to starve to death, but I'm persevering, and it is paying off.  I will get to my goal weight this year!  Just wait and see....
In the meantime enjoy these weight loss comics I found for you.  :)


Thanks for reading!!!

Monday, February 4, 2013

Ball Jar Pin Cushions

 
Awhile back I made these super cute pin-cushions.  I found the tutorial on Make it and Love it here.  Hers were so cute and easy that I decided I needed one.
Well,
they only sell packages of canning jars.  Who knew!?!
So I had to buy 12.
They were on sale though so it only cost me a little under $6.
I had all the other stuff on hand, so it was a very easy project.

 
So now I have lots of them.  I gave one to each of the girls in my sewing group, and I'm saving one for my mom and daughter.

 
If you decide that you need one too, go to her blog and follow her tutorial.  Because it's fantastic!
 
 
Happy Creating!