...where I share my life, craftiness and eating habits with the world...

Wednesday, October 17, 2012

Sweetie Pie Owls

Is this not the cutest owl figurine ever?
It is an adorable Mama and Baby Owl, see how she protects her beautiful wee one with her wing.
So sweet, so loving, so pretty...
 
OMG!  What is the hideous thing!?!
It's horrible, and ugly, and terrifying!
That cannot be the same beautiful figurine as above?
It sure is.
 
Isn't it amazing what a little paint will do?
I used Rust-oleum Painters Touch Spray paint in Key Lime.
It is great paint!  It only took 2 coats to cover the ugly.
I almost didn't buy this little guy because I wasn't sure if it was salvageable.  Thank goodness for my hubs!  He told me it would be OK, and he was so right.  :)  It only cost $1.99, such a steal!
Owls are all the rage right now too, in nursery's and children's rooms.  This little duo is going into my bedroom to remind me of my sweet wee ones.
The only thing that would make it better is if there were 2 owlets.
 
Thanks for reading!


Tuesday, October 16, 2012

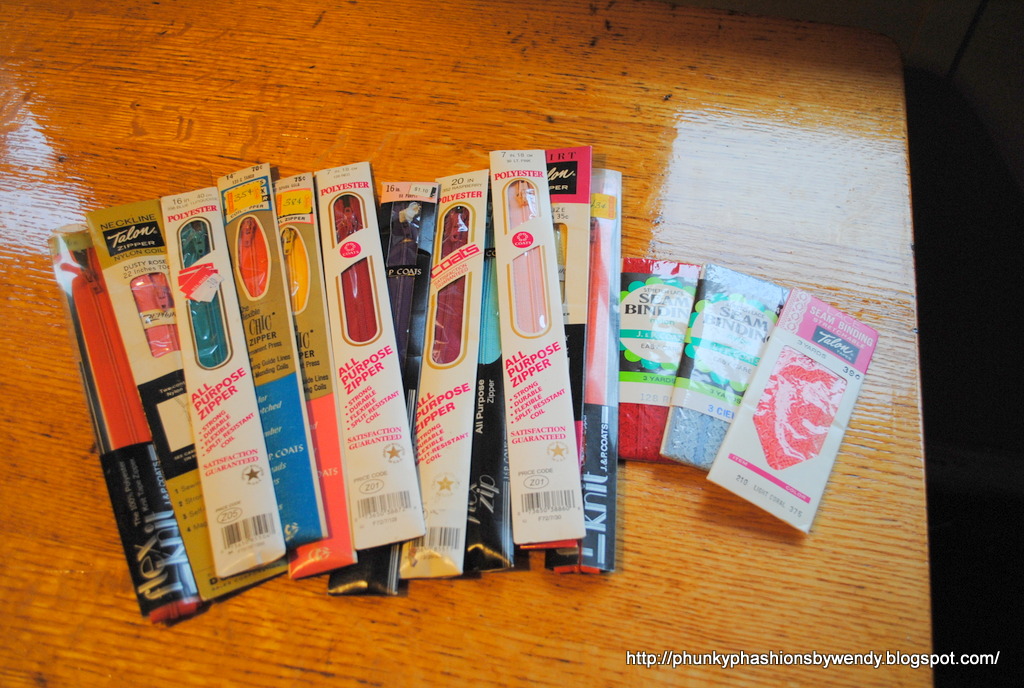
Thrift Store Score #6: Zippers Galore

I love these posts! The problem most of the time is that I find so much great stuff that it is hard to pick just one!
Look at all those zippers!
Every one of them is brand new and awesome!
(Did I tell you that I learned how to put in a zipper finally?)
 
 
And I kid you not, I got all of this stuff for $2.10.
$0.10 per zipper and $0.30 for each seam binding.
I don't even know what seam binding is for, but it is so pretty...
 
 
Love the little purple zip...I can't wait to make stuff with them.
 
 
See, the seam binding is so pretty and lacy.  It might make some fun trim for a skirt.  I love the retro coral one.
Thanks for reading!


Thursday, October 11, 2012

Captain America aka Max

There he is...
Captain America
aka
Max
He love love loves his costume. He wouldn't take it off yesterday.  He wore it to the post office, the thrift store and wanted to wear it to school.  I had to make him take it off for school. Silly boy.
 
 
When he told me that is who he wanted to be, I had to sketch it out in my head.  The outfit is actually pretty simple if you think about it.
I used this pattern for the basic shape, I just left the front open and attached the hood.
The best part?  I have used this pattern for the last 3 years to make his costumes.  Last year he was a monkey, the year before he was Max-The King of the Wild Things.
The A and the star were probably the most difficult part.  I had to draw my own pattern for them, but I think it turned out just right.
The costume is very basic, and that is why I like it.
It is very childlike.  No fake muscles and skintight jumpsuits. And all store bought super-hero costumes have a mask.  He is not allowed to wear a mask to school.
 As you can see, he loves it.
A lot.
 
 
Look at how sweet he is.

 
CHEESE!
 
 
Thanks for reading!


P.S.
 There is my King of the Wild Things and my little monkey.  You can't see his tail, but it was the best part, it was curly.  :D


Tuesday, October 9, 2012

All Zipped Up~Halloween Pouch


I did it!
I finally put in my first zipper!
I used a tutorial that I found online here on Noodlehead.
I am going to give it as a teacher gift for Halloween.

I'm going to fill it with candy and a Bath & Body Works hand sanitizer with hangy thingy.  It's gonna be super-great, and if I was still a teacher I would love it!
(The man-teacher just gets some candy)


 I thought the orange and black and green color scheme looked great for Halloween.

Thanks so much to Noodlehead blog for the great(and super-fast) tutorial.
Really, it only took me about 20 minutes from start to finish!

Thanks so much for reading!


Monday, October 8, 2012

Chevron Nightstand


I know I already did a post about nightstands earlier here, but I thought this one needed a bit of....something.
More pizazz
More "Look at me!"
So, I jumped on the Chevron bandwagon!
And I gotta tell you, I totally love it!
So subtle, so pretty, so...so...
I can't even think of a word for it! lol


Score!  I also learned how to use PicMonkey a little better.  I still don't like it as much as Picnik, but these edits are cool, and I figured out how to save to my computer.(Finally.)


This is what it looked like before.  Not terrible, but not super cute either.  It looks so much better now.
 
 
Here's a little peek at how it's done.  I basically did it the easy way.  I used painters tape as the ruler.
I started with the middle, I put on strip to the left so that the end of the tape was the exact middle of the drawer.
Then I did my first stripe from the bottom middle to the top corner.
I next used the tape width as the stripe width.
I painted several coats over the course of a couple days to get the desired look.  A wash out look would've been cool too.
(Drier brush, not a lot of coverage)
I used leftover paint from my other project here.
It is gray on white, and looks lovely in my living room.
My son wants a green dresser with a motorcycle on it.  I told him maybe.  :)


Thursday, October 4, 2012

PVC Pipe Garment Rack Do-Over

 As you all know, in August I made a PVC Pipe Garment Rack.
It turned out pretty cool and I was proud that I made it myself.
However...
I am a perfectionist(mostly) and it just wasn't working like it was supposed to.  So I did what anyone would do...
I re-did it!
 

It really works out so much better now.  It holds a ton of stuff too!
The directions are super easy.
If you made the old one and just need to re-do like me...
All you have to buy is one more 4-way connector and cut 5 inches off each of your 40 inch pieces...
 
Supply List
 
1. 10 foot piece of 1 inch PVC pipe cut like this

          3 pieces of 35 in
          4 pieces of 18 inch
          3 pieces of 5 inch
          4 pieces of 12 inch
2. 6 elbows
3. 3 3-way connectors
4. 4 4-way connectors
You should have 14 cut pieces of pipe.  The people at Menard's will cut it for you if you ask real nice.
 
Here is a pic of what the bottom looks like, for reference.

 Here is the crappy diagram I made on paint!
Hope it helps.
 
 
The easiest way to put it together is to lay it out like the diagram and then just connect the pieces!
Voila! Done!
Thanks for reading!


Monday, October 1, 2012

Thrift Store Score 5: Something's Fishy

Thrift Store Score is probably my most favoritest thing to post about!  I love sharing all the great(and cheap)  stuff I get while thrifting.
For example, I got 4 fishy placemats for the low, low price of $0.99.  A steal if you ask me.  Especially after seeing this post by Sweet Verbena.  She is brilliant!
Here is a pic of 3 of the 4.  I got such a deal on them because one had a hole and the others had small stains on them.  The best part?  The stains came right out when I washed them!
(Don't mind the crappy pics, I was taking them after bedtime)
 
I decided to make 2 of them into pillows for my living room.  Something colorful and whimsical to add fun to my beachy cottage.


All I did was seam rip part of the tail, and add stuffing from the old worn out pillows, sew it up and TA-DA...new fishy pillows!
 
 
They are super cute too!
(Don't mind my old worn out couch, I'm too cheap to get a new one yet.)
I'm waiting til my kids grow up.
That's what I keep telling myself anyway...
Think of what you could do with a placemat!
I'm making one into a purse...fun huh?
Thanks for reading!