...where I share my life, craftiness and eating habits with the world...

Monday, October 29, 2012

Jack Skellington Pillow Cover


I pinned this great pillow cover last Halloween here.
I knew I could make a similar one because I love Jack so much!  It is one of my all time favorite movies and my kids love it too!
The best part?  It was really easy!!
 
Here's a list of supplies
  • 2 fat quarters(any color you want)
  • Approx 10 inch square of white fleece or felt
  • 8x10 inch piece of black fleece or felt
  • sewing machine, thread, etc.
  • 14 inch pillow form
I like to change my pillows to match the season or the holiday so it is way easier to store a cover opposed to a whole pillow.  Plus I have young children so it is easy to wash if you do it this way.
 
First thing you do is trace something round onto your white piece of fabric.  I used a standard size dinner plate.  I also used my rotary cutter and mat to make this part super simple.


 Next I ironed the fat quarters to make them crease free and cut one into a 15x15 square.(Next time I will do a 16x16 so it gives some wiggle room).  The other one I cut into approx a 15 x 22 rectangle.  Basically just cut 3 inches off of the long side.  Then I free-handed the facial features.  The eyes I styled off of pictures I googled and the nostrils are tiny teardrop shapes.  The mouth stitches are too wide here, I cut them each in half length-wise before sewing them on.  It was simple, I promise!


 I sewed on the head with white thread in a zigzag stitch.

Then I sewed on the eyes and nose with black in a basic stitch.  Then the mouth in the same way.  That was the time consuming part.  

 
The 15x22 inch piece got cut in half to make the back envelope part of the cover.  So the pieces are approx 11x15.
 

I did a fold over hem on one 15 inch side of each back piece.  Next, I overlapped both back pieces and matched them up to the outside edges of the cover front.  Right sides together of course!


The last thing to do, is sew around the whole square cover.  After you are done, turn it right side out through the envelope back that you just made, and VOILA!  Pillow cover!!!


I think it looks awesome!
Thanks for reading!
 

Monday, October 22, 2012

Little Girl Patchy-Bag

I have a birthday party to go to this weekend.
For a very special little girl and I wanted to make her something that is as fun and vibrant as she is.
This is the perfect size bag for a soon to be 9 year old.
 It is also a cinch to make out of all those little scraps of fabric that you thought were of no use.
I simply modified the Shabby Chick Ruffle Bag tute here.
I made the squares 4x4 and the lining 11x10.
11 across and 10 vertically.
(does that make sense?)
The notches out of the bottom are only 1 inch & the strap can be any length you want.
I used as many different kinds of fabric as I could.
I think it turned out super cute!
 She's going to love it!!!
 
 
Now I just have a few more to make so I always have one on hand for those last minute school party invites.
That always get "found" by my daughter at the last minute.


Friday, October 19, 2012

My Halloween Decor

Do you decorate for Halloween?
I do!
Halloween is my favorite!!!!
Here is a little peek of some of my Halloween decor, I hope it inspires you to decorate your house.  :)
My makeshift "mantel".  I love my Jack-o-Lantern Scentsy!
(I don't have a fireplace)
 
 
Here is a side table with some Halloween pics of my babies through the years...so cute!
 
 
The graveyard my awesome hubs made for me.
 
 
The banner(I got a Target) that I hang over my frame wall.
 
 
(More Target)
 
 
Kitchen
 
 
Hubs made me this skull.  I think it looks like it has a big bushy mustache, but hey, mustaches are in right??
 
My entry is a tad blah, maybe I'll make it over next spring!
B/c you know, paint is magic!
 
 It's glittery, but in this pic you can't tell.

Hope you enjoyed the pics of my Halloween decor.  I like to go all out, but I do not like those inflatable things.  They are big and obnoxious and I wish I could just drive down the road and shoot at them with BB guns!  lol
Hope you have a safe and happy Halloween!


Wednesday, October 17, 2012

Sweetie Pie Owls

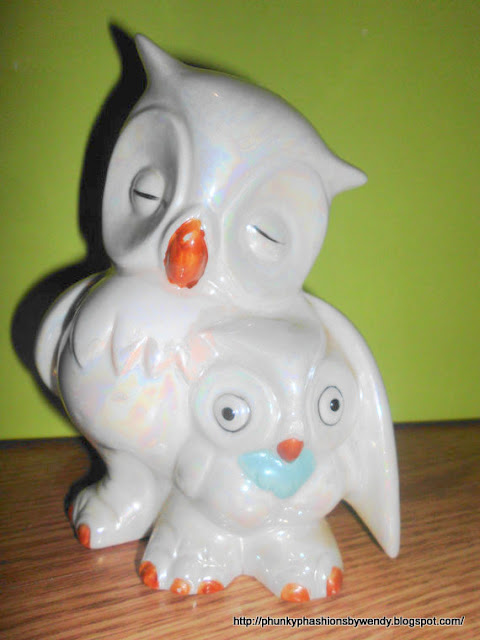
Is this not the cutest owl figurine ever?
It is an adorable Mama and Baby Owl, see how she protects her beautiful wee one with her wing.
So sweet, so loving, so pretty...
 
OMG!  What is the hideous thing!?!
It's horrible, and ugly, and terrifying!
That cannot be the same beautiful figurine as above?
It sure is.
 
Isn't it amazing what a little paint will do?
I used Rust-oleum Painters Touch Spray paint in Key Lime.
It is great paint!  It only took 2 coats to cover the ugly.
I almost didn't buy this little guy because I wasn't sure if it was salvageable.  Thank goodness for my hubs!  He told me it would be OK, and he was so right.  :)  It only cost $1.99, such a steal!
Owls are all the rage right now too, in nursery's and children's rooms.  This little duo is going into my bedroom to remind me of my sweet wee ones.
The only thing that would make it better is if there were 2 owlets.
 
Thanks for reading!


Tuesday, October 16, 2012

Thrift Store Score #6: Zippers Galore

I love these posts! The problem most of the time is that I find so much great stuff that it is hard to pick just one!
Look at all those zippers!
Every one of them is brand new and awesome!
(Did I tell you that I learned how to put in a zipper finally?)
 
 
And I kid you not, I got all of this stuff for $2.10.
$0.10 per zipper and $0.30 for each seam binding.
I don't even know what seam binding is for, but it is so pretty...
 
 
Love the little purple zip...I can't wait to make stuff with them.
 
 
See, the seam binding is so pretty and lacy.  It might make some fun trim for a skirt.  I love the retro coral one.
Thanks for reading!


Thursday, October 11, 2012

Captain America aka Max

There he is...
Captain America
aka
Max
He love love loves his costume. He wouldn't take it off yesterday.  He wore it to the post office, the thrift store and wanted to wear it to school.  I had to make him take it off for school. Silly boy.
 
 
When he told me that is who he wanted to be, I had to sketch it out in my head.  The outfit is actually pretty simple if you think about it.
I used this pattern for the basic shape, I just left the front open and attached the hood.
The best part?  I have used this pattern for the last 3 years to make his costumes.  Last year he was a monkey, the year before he was Max-The King of the Wild Things.
The A and the star were probably the most difficult part.  I had to draw my own pattern for them, but I think it turned out just right.
The costume is very basic, and that is why I like it.
It is very childlike.  No fake muscles and skintight jumpsuits. And all store bought super-hero costumes have a mask.  He is not allowed to wear a mask to school.
 As you can see, he loves it.
A lot.
 
 
Look at how sweet he is.

 
CHEESE!
 
 
Thanks for reading!


P.S.
 There is my King of the Wild Things and my little monkey.  You can't see his tail, but it was the best part, it was curly.  :D


Tuesday, October 9, 2012

All Zipped Up~Halloween Pouch


I did it!
I finally put in my first zipper!
I used a tutorial that I found online here on Noodlehead.
I am going to give it as a teacher gift for Halloween.

I'm going to fill it with candy and a Bath & Body Works hand sanitizer with hangy thingy.  It's gonna be super-great, and if I was still a teacher I would love it!
(The man-teacher just gets some candy)


 I thought the orange and black and green color scheme looked great for Halloween.

Thanks so much to Noodlehead blog for the great(and super-fast) tutorial.
Really, it only took me about 20 minutes from start to finish!

Thanks so much for reading!


Monday, October 8, 2012

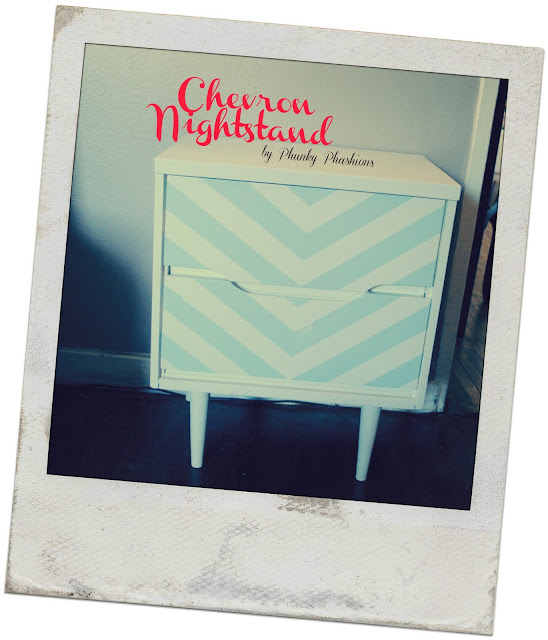
Chevron Nightstand


I know I already did a post about nightstands earlier here, but I thought this one needed a bit of....something.
More pizazz
More "Look at me!"
So, I jumped on the Chevron bandwagon!
And I gotta tell you, I totally love it!
So subtle, so pretty, so...so...
I can't even think of a word for it! lol


Score!  I also learned how to use PicMonkey a little better.  I still don't like it as much as Picnik, but these edits are cool, and I figured out how to save to my computer.(Finally.)


This is what it looked like before.  Not terrible, but not super cute either.  It looks so much better now.
 
 
Here's a little peek at how it's done.  I basically did it the easy way.  I used painters tape as the ruler.
I started with the middle, I put on strip to the left so that the end of the tape was the exact middle of the drawer.
Then I did my first stripe from the bottom middle to the top corner.
I next used the tape width as the stripe width.
I painted several coats over the course of a couple days to get the desired look.  A wash out look would've been cool too.
(Drier brush, not a lot of coverage)
I used leftover paint from my other project here.
It is gray on white, and looks lovely in my living room.
My son wants a green dresser with a motorcycle on it.  I told him maybe.  :)